Stealth Screen Recorder

Introducing Stealth Screen Recorder

Stealth Screen Recorder is a command-line tool designed for 24/7 continuous screen recording with no visible UI. Leveraging high-performance GPU-accelerated screen capture and video encoding, it achieves exceptionally low CPU usage, making continuous recording efficient and unobtrusive. Unlike other software that can heavily tax system resources, Stealth Screen Recorder runs smoothly on mainstream hardware, operating discreetly in the background without impacting user experience.

Software Features

Stealth Screen Recorder is designed with the following features that make it a versatile tool for continuous screen recording:

Key Features

  • 24/7 Continuous Recording: Operates continuously with extremely low CPU usage, ideal for long-term monitoring and recording.
  • Stealth Mode: The tool runs silently in the background with no UI, ensuring it remains unnoticed while recording.
  • Daemon Mode: Ensures continuous screen recording by launching a secondary process that monitors if the main process crashes or is terminated. This redundancy helps maintain uninterrupted recording even in unexpected situations.
  • GPU-Accelerated Capture and Encoding: Utilizes GPU acceleration for screen capture and video encoding, significantly reducing CPU usage while delivering high-quality recordings.
  • Multi-monitor Screen Capture: Supports capturing screens across multiple monitors simultaneously, ensuring that all displays are recorded, providing a comprehensive view of the user’s workspace.
  • Multi-user Support with Access Control: Works seamlessly when multiple users are logged in simultaneously and allows administrators to restrict access to recorded video files, ensuring that non-privileged users cannot view sensitive recordings.
  • Easy Deployment: Network administrators can easily deploy the MSI installer through group policy and set up a scheduled task to automate the screen recording, streamlining deployment and management across multiple computers.
  • Segmented Recording: Automatically splits recordings into segments based on time or file size, ensuring no single file becomes too large. Each segment is saved with a filename containing a date time string, making it easy to locate and review recordings from a specific time range.
  • Retention Period Management: Automatically deletes recordings that exceed a specified retention period, helping to manage storage effectively.
  • Low Disk Space Management: Automatically deletes the oldest recordings to free up disk space when the specified threshold is reached.

Advanced Customization

  • Variable File Path: By specifying variables like computer name, user name, and date in the output file path, recorded videos can be automatically organized into structured directories, simplifying management and retrieval.
  • Video Format Support: Record videos in MKV, MP4 or FLV formats. Both MKV and FLV formats remain playable even if the recording is interrupted, ensuring no data is lost in the event of an unexpected termination.
  • Video Resolution: Adjustable resolution to match screen dimensions or custom values, ensuring optimal file sizes and quality.
  • Frame Rate: Configurable frame rate from 0.01 to 200 FPS, balancing performance with recording quality.
  • Video Quality: Set the video quality using a scale from 1 to 51, allowing precise control over file size and quality.
  • Audio Recording: Optionally enable audio recording with configurable bitrates, enhancing the context of your recordings.
  • Text Overlay: Overlay custom text on any corner of the video, with variables to display the computer name, user name, and various date and time formats. This allows for easy identification and timestamping of the recording.
  • Automatic Startup: Configure the tool to start automatically with Windows, ensuring it is always running without manual intervention.

Usage Guide

Stealth Screen Recorder is highly configurable, allowing you to tailor it to your specific needs. Below are detailed instructions on how to use the software with various command-line options.

Installation

Double-click the SSR.msi (64-bit version) or SSR32.msi (32-bit version) to run the installation wizard. Follow the steps to complete the installation. The default installation path is:

  • 64-bit: C:\Program Files\ZD Soft\SSR
  • 32-bit: C:\Program Files (x86)\ZD Soft\SSR

For network administrators, Stealth Screen Recorder can be deployed silently across multiple machines using Group Policy in Active Directory.

Uninstallation

To uninstall Stealth Screen Recorder, re-run the SSR.msi or SSR32.msi file. The wizard will provide options to Repair or Remove the software. Select ‘Remove’ to uninstall.

For network administrators, you can also remove the software from multiple machines using Group Policy in Active Directory.

Running Stealth Screen Recorder

While Stealth Screen Recorder includes an option (--autoRun) to automatically run at Windows startup by adding an entry to the Windows registry, using Windows Task Scheduler is the recommended approach. It allows you to easily configure the program to run with administrator privileges, using a pre-entered password. This ensures screen recordings can be saved in secure folders, restricting access to standard users. Follow the steps below to set it up:

1. Open Task Scheduler
  • Press Win + R, type taskschd.msc, and press Enter.
2. Create a New Task
  • In Task Scheduler, click Action in the menu bar (or in the right pane) and select Create Task.
3. General Tab
  • Name: Enter a name for your task (e.g., “SSR”).
  • User Account: Choose an administrator user account to run the task.
  • Run whether user is logged on or not: Select this option.
  • Run with highest privileges: Check this box to ensure the task runs with administrator rights.
  • Configure for: Select the appropriate version of Windows (e.g., Windows 10).
4. Triggers Tab
  • In the Triggers tab, click New, set the Begin the task option to At startup, and click OK to save the trigger.
5. Actions Tab
  • In the Actions tab, click New, choose Start a program, and enter the path to the executable of Stealth Screen Recorder (e.g., C:\Program Files\ZD Soft\SSR\SSR.exe). Add arguments: -o "C:\Path\to\empty\folder\<date>\<pc-name>\<user-name>\screen.mkv" -a 64Kbps
6. Conditions Tab
  • In the Conditions tab, ensure all options are unchecked.
7. Settings Tab
  • In the Settings tab, uncheck all options except Allow task to be run on demand.
8. Save the Task
  • Click OK and enter the password for the selected user account when prompted.
9. Run the Task Manually (If you want to test it immediately)
  • To manually run the task, go to Task Scheduler Library, find the task, right-click it, and select Run.
10. Stop the Task Gracefully (Exit all instances of Stealth Screen Recorder)
  • To stop the task gracefully, create a new task (e.g., “SSR Exit”) with the same settings as above, but without a trigger, and replace the command-line arguments with --exit. To manually stop Stealth Screen Recorder, go to the Task Scheduler Library, locate the “SSR Exit” task, right-click it, and select Run. This will ensure all instances of Stealth Screen Recorder exit gracefully.

Stealth Screen Recorder will now automatically run at startup with administrator privileges and pre-entered credentials, and will stop when the system shuts down. Additionally, it can be manually started and stopped on demand.

Program Logs

Stealth Screen Recorder operates without a visible UI and reports its status to the Windows Event Log. If you encounter issues, you can check the logs in Event Viewer, export them, and send them to us for assistance. Follow these steps to view and export the logs:

1. Open Event Viewer: Press Windows + R, type eventvwr.msc, and press Enter.

2. Find the Log: In the left pane, expand Applications and Services Logs, select ZD Soft.

3. View the Logs: Click a log entry to view the details.

4. Export the Log: Click the Save All Events As… in the right pane, choose a location and click Save.

Command-Line Options

Stealth Screen Recorder operates entirely through command-line options, providing extensive control over its behavior. Below are the available options:

  • [-o|--videoOutput] <file> : Specify the full path for the output video files. Supported formats include MKV, MP4, and FLV. You can use variables such as <pc-name>, <user-name>, and <date> in the file path. Additionally, a date-time string in the format ‘YYYY-MM-DD hh;mm;ss’ is automatically appended to each filename. Network shared folders are also supported, allowing for remote and centralized storage of screen recordings across multiple computers on a network. By default, recordings are saved in the ‘ZD Soft\SSR’ sub-directory within the user’s ‘Videos’ folder, with filenames formatted as ‘Rec YYYY-MM-DD hh;mm;ss.mkv’.
  • [-w|--videoWidth] <width> : Specify the output video width. The width must be a multiple of 2, with a maximum value of 3840. Set the width to 0 to automatically match the actual screen width. If the specified video dimensions do not match the screen dimensions, the video will be scaled accordingly. By default, the video width is set to 0 to match the screen width.
  • [-h|--videoHeight] <height> : Specify the output video height. The height must be a multiple of 2, with a maximum value of 2160. Set the height to 0 to automatically match the actual screen height. If the specified video dimensions do not match the screen dimensions, the video will be scaled accordingly. By default, the video height is set to 0 to match the screen height.
  • [-f|--videoFPS] <fps> : Specify the output video frame rate in frames per second, ranging from 0.01 to 200. A lower frame rate reduces CPU and GPU usage, while a higher frame rate increases it. By default, the frame rate is set to 10 FPS.
  • [-q|--videoQuality] <quality> : Specify the output video quality, with a value ranging from 1 to 51. A lower number results in higher video quality and larger file size, while a higher number reduces quality and file size. By default, the quality is set to 28.
  • [-a|--audioBitrate] <bitrate> : Enable audio recording and specify the bitrate in Kbps. Valid bitrates are 64Kbps, 96Kbps, 128Kbps, 160Kbps, 192Kbps, 256Kbps, and 320Kbps. By default, audio recording is disabled.
  • [-t|--segmentTime] <time> : Specify the output video segment time in seconds, minutes, hours, or days. When the recording length exceeds the specified segment time, a new video file is automatically created. Set to 0 to bypass the segment time check. By default, the segment time is set to 10 minutes. (In the free trial version, it is limited to a maximum of 10 minutes.)
  • [-s|--segmentSize] <size> : Specify the output video segment size in KB, MB, GB, or TB. When the file size reaches the specified segment size, a new video file is automatically created. Set to 0 to bypass the segment size check. The maximum file size is limited to 4GB, regardless of the segment size setting. By default, the segment size is set to 0.
  • [-d|--lowDiskSpace] <size> : Specify the low disk space threshold. When free disk space falls below this limit, the earliest recorded video files will be automatically deleted to free up space. By default, the threshold is set to 10GB.
  • [-r|--retentionPeriod] <time> : Specify the retention period for recorded video files in seconds, minutes, hours, or days. Files older than the specified period will be automatically deleted. Set to 0 to disable retention. By default, the retention period is set to 3 days. (In the free trial version, it is limited to a maximum of 3 days.)
  • [--hideCursor] : Hide the mouse cursor in screen recordings. By default, the mouse cursor is included and visible in screen recordings.
  • [--textOverlay] <text> : Specify the text to overlay on the video. You can include variables such as <pc-name>, <user-name>, <date>, <time>, <time-ms>, <date-time>, <long-date>, and <long-date-time>. By default, this is empty, and no text will be overlaid.
  • [--textPosition] <position> : Specify the position of the overlaid text on the video. Valid values are: 0 (top-left), 1 (top), 2 (top-right), 3 (right), 4 (bottom-right), 5 (bottom), 6 (bottom-left), 7 (left), 8 (center). The default is 0 (top-left).
  • [--textMarginX] <x> : Specify the horizontal margin for the text overlay as a percentage of the video width. The default is 0.5, meaning 0.5% of the video width.
  • [--textMarginY] <y> : Specify the vertical margin for the text overlay as a percentage of the video height. The default is 0.5, meaning 0.5% of the video height.
  • [--textFontHeight] <height> : Specify the font height of the overlaid text as a percentage of the video height. The default is 2, meaning 2% of the video height.
  • [--textFontName] <name> : Specify the font name for the overlaid text. The default is ‘Arial’.
  • [--textFontColor] <color> : Specify the font color of the overlaid text using the format #RRGGBB. The default color is #FFFFFF (white).
  • [--textFontOpacity] <opacity> : Specify the opacity of the font color, ranging from 0.0 to 1.0. The default is 1.0, which is fully opaque.
  • [--textFontOutline] <thickness> : Specify the thickness of the black outline around the text to ensure visibility against similar background colors. The default is 1.0.
  • [-k|--licenseKey] <key> : Enter the license key to activate the premium version and remove the free trial limitations. By default, no license key is entered.
  • [--deactivate] : Deactivate the current/specified license key. If a key is specified with `-k <key>` or `–licenseKey <key>`, that key will be deactivated. Otherwise, the current key will be deactivated. To transfer a license key to another computer, deactivate it on the old computer first, then activate it on the new one.
  • [--consentNotice] <message> : Display a custom message box with ‘Yes’ and ‘No’ buttons to request user consent before starting screen recording. If the user selects ‘Yes’, recording will begin; if ‘No’ is selected, the program will exit immediately. Displaying the consent notice is optional and disabled by default.
  • [--recordingNotice] <message> : Display a custom message box with an ‘OK’ button to notify the user that screen recording is starting. This ensures the user is aware that recording is in progress, but they cannot stop the recording. Displaying this notification is optional and disabled by default.
  • [--skipScreenSaver] : Configure the program to skip screen recording when a screen saver is active. Since screen savers are typically displayed when the computer is idle, recording them may be unnecessary and could result in large, meaningless video files. Enabling the option helps reduce overall recording file size. By default, this option is disabled.
  • [--autoRun] : Configure the program to run automatically at Windows startup by adding an entry to the Windows registry. This setting applies only to the current user. To run the program automatically for all users, it is recommended to set up a task in Windows Task Scheduler.
  • [--daemon] : Launch a secondary instance of the program as a daemon process. If the main process crashes or is terminated unexpectedly, the daemon will take over and continue screen recording, while launching a new daemon process to maintain the loop. This mechanism ensures continuous screen recording with minimal interruption.
  • [--exit] : Stop screen recording and exit all running instances of the program. This command requires the program to be run as administrator.

Option names are case-sensitive. Long option names must begin with double hyphens (--).

Basic Usage Example

Command: SSR.exe -a 64Kbps

Description: Starts screen recording with default settings. Stealth Screen Recorder will output screen recording videos to the ‘ZD Soft\SSR’ sub-directory under the ‘Videos’ folder of the user’s home directory. The video resolution will match the screen resolution with a maximum resolution limitation of 3840×2160 (4K). The video frame rate will be 10 frames per second. The video quality number will be 28 that results in fairly good video quality. Audio capture is enabled at 64Kbps. The segment time will be 10 minutes. No segment size limit. The low disk space threshold size will be 10GB. The retention period will be 3 days. Ideal for typical use cases.

High-Quality Recording Example

Command: SSR.exe -f 30 -q 20 -a 128Kbps -t 1hour

Description: This command increases the video frame rate to 30 FPS and sets the video quality to 20 for higher video quality. Audio recording is enabled at 128Kbps, and the segment time is extended to 1 hour, making it suitable for situations where video quality is critical.

Long-Term Recording Example

Command: SSR.exe --daemon --autoRun -o "D:\My recordings\screen.mkv" -h 1080 -f 1 -q 51 -a 64Kbps -t 30minutes -r 30days

Description: This command configures Stealth Screen Recorder to run automatically at Windows startup, and output screen recording videos to “D:\My recordings\screen YYYY-MM-DD hh-mm-ss.mkv”. The video height is set to 1080, forcing the resolution to match while keeping the original screen aspect ratio. The video frame rate is set to 1 frame per second, significantly reducing CPU & GPU usage, and the video quality is set to the lowest to minimize file size. Audio capture is enabled at 64Kbps, with a segment time of 30 minutes and a retention period of 30 days, making it suitable for single-user long-term monitoring with minimal disk space requirements.

Example of Recording with Text Overlay

Command: SSR.exe -a 64Kbps --textOverlay "REC <pc-name>\<user-name> <long-date-time>" --textPosition 2 --textFontName "Courier New" --textFontColor #ffff00 --textFontOpacity 0.8 --textFontOutline 1.5

Description: This command demonstrates how to add a text overlay displaying the computer name, user name, and date-time in long format will appear at the top-right corner of the video. The overlay uses the ‘Courier New’ font in semi-transparent yellow with a thicker black outline for enhanced visibility.

Usage Scenarios

Stealth Screen Recorder is ideal for various scenarios that require continuous, unobtrusive screen recording:

1. Compliance Monitoring in Regulated Industries

In industries like finance, healthcare, and legal services, there are strict regulations requiring that certain activities be recorded for compliance purposes. Stealth Screen Recorder can be used to continuously monitor and record screen activities on computers that handle sensitive transactions or patient information, ensuring that all actions are documented for compliance audits.

Benefit: Ensures adherence to industry regulations and provides a reliable record for audits without interrupting daily operations or alerting users.

2. Employee Performance Review

In environments where performance metrics are crucial, such as customer service or sales departments, Stealth Screen Recorder can be used to record screen activities for performance reviews. Managers can later review these recordings to assess employee productivity, adherence to protocols, and overall performance.

Benefit: Provides objective data for performance evaluations, allowing managers to make informed decisions regarding training, rewards, or necessary improvements.

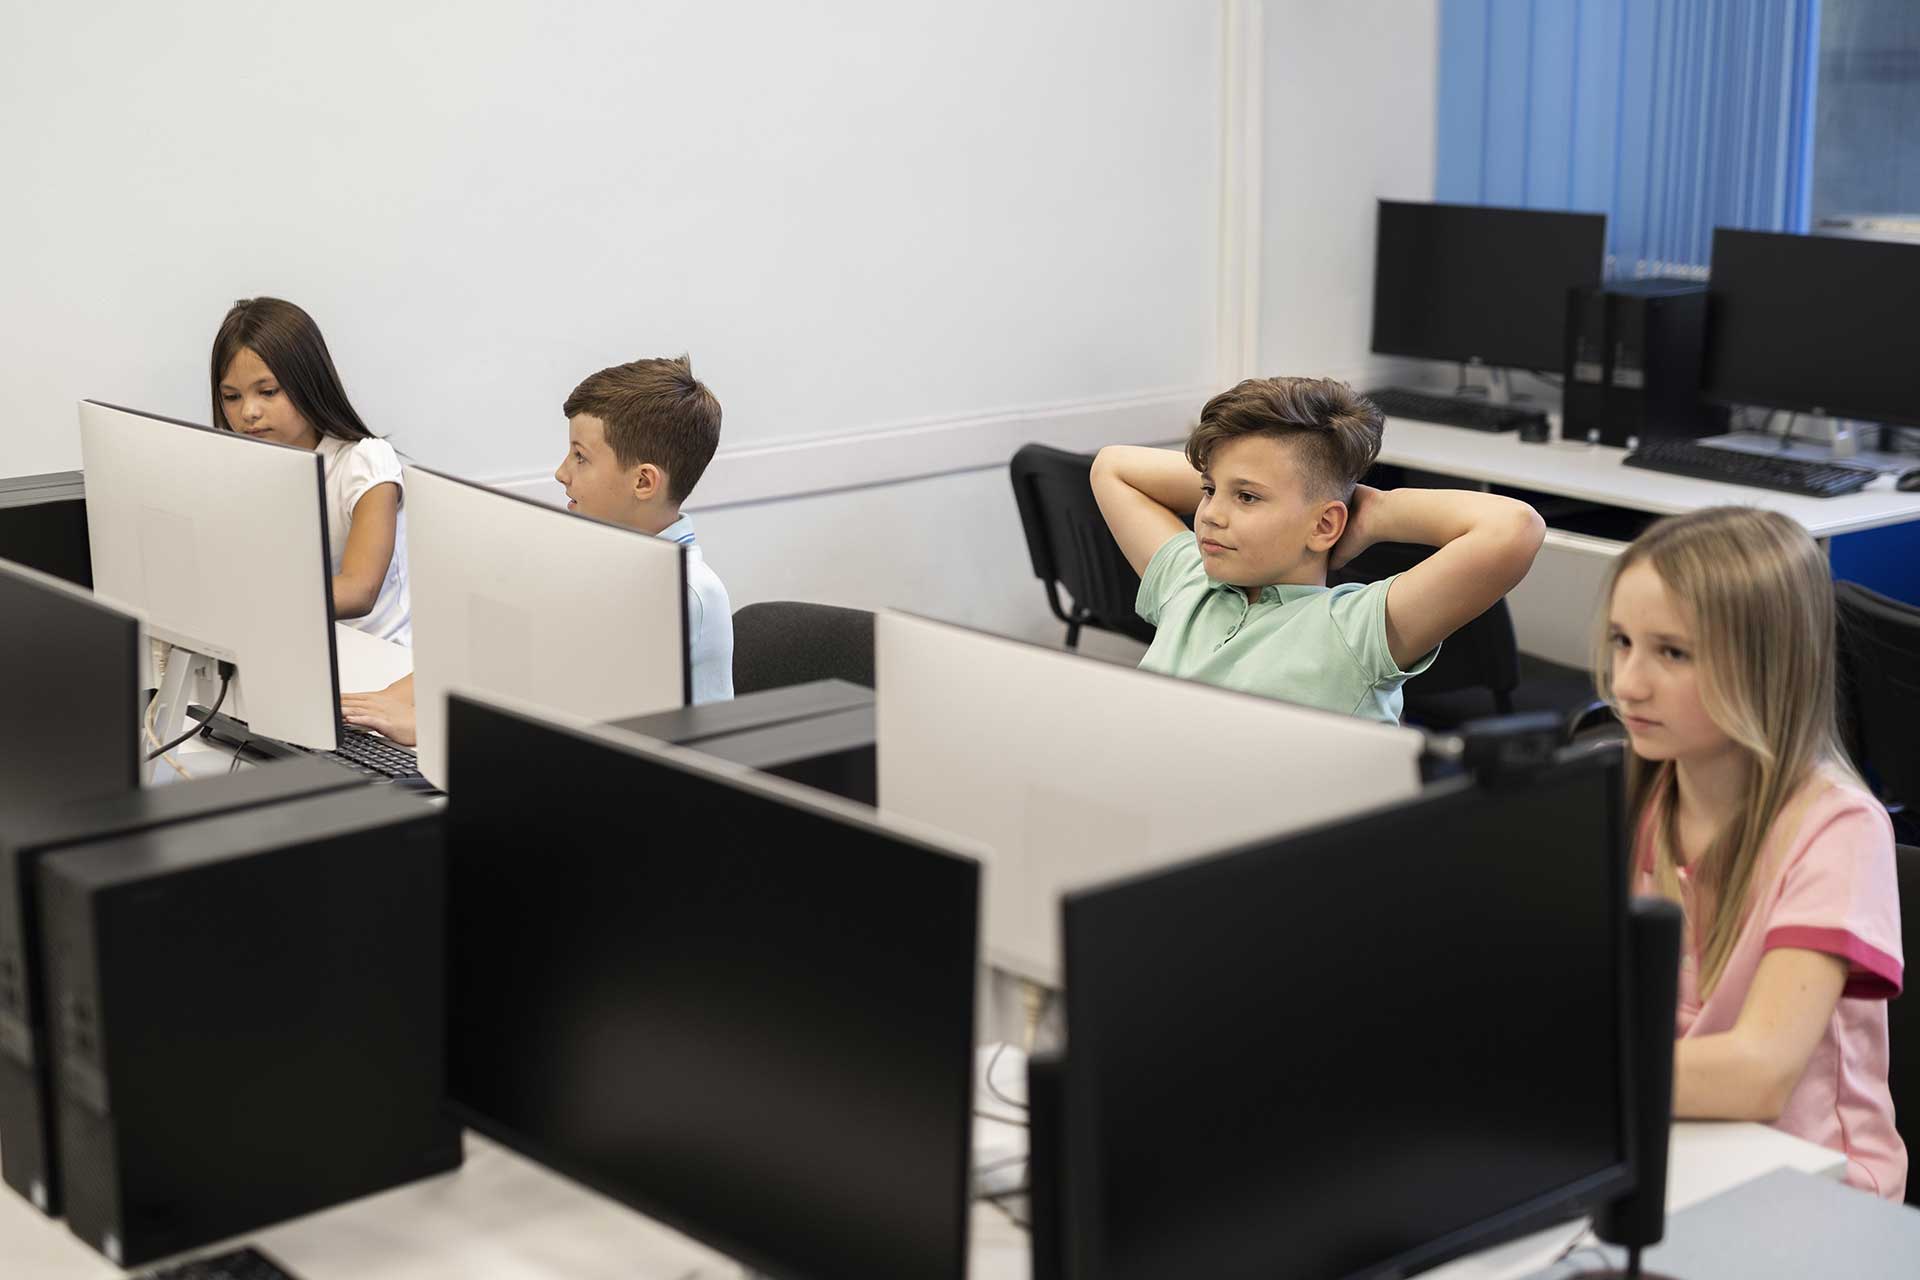
3. Academic and Research Monitoring

In academic settings, particularly in research labs or computer-based exams, Stealth Screen Recorder can monitor student or researcher activities to ensure that protocols are followed correctly. It can also be used to capture and archive research processes for future analysis or to validate findings.

Benefit: Enhances academic integrity by providing a record of student or researcher activities, ensuring that proper procedures are followed.

4. Remote Worker Monitoring

With the rise of remote work, companies may want to monitor remote employees to ensure that work is being conducted efficiently and securely. Stealth Screen Recorder can capture remote workers’ screen activities without disrupting their workflow, providing insights into productivity and compliance with company policies.

Benefit: Helps maintain accountability and productivity in a remote work environment, while also ensuring that company resources are used appropriately.

5. Parental Control and Child Activity Monitoring

Parents concerned about their children’s online activities can use Stealth Screen Recorder to monitor and record everything that happens on their children’s computers. This includes monitoring for inappropriate content, excessive gaming, or interactions with strangers online.

Benefit: Provides parents with peace of mind by allowing them to review their children’s activities and ensure a safe online environment.

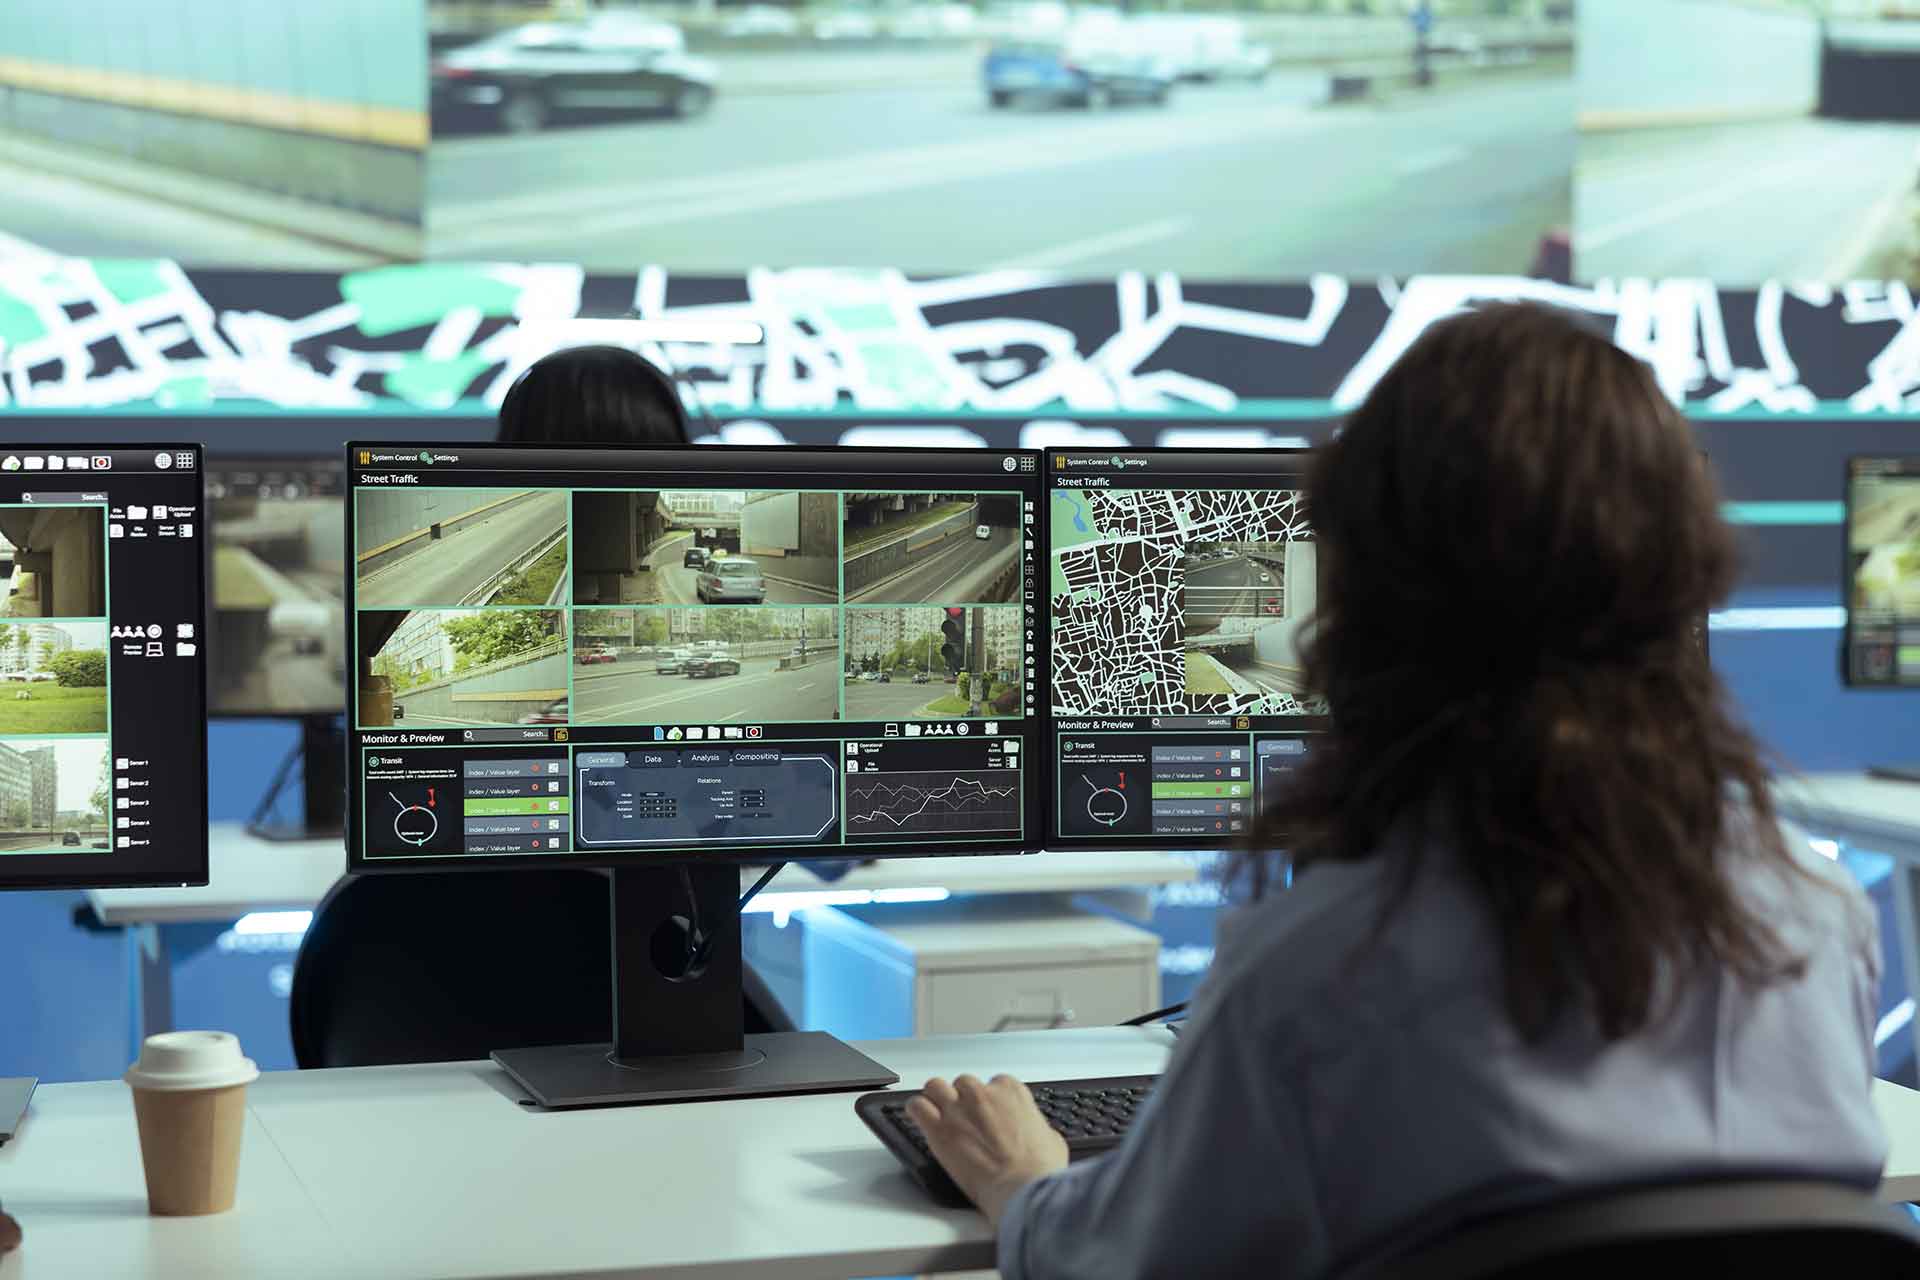
6. Security Monitoring and Threat Detection

Stealth Screen Recorder can be used as a security tool to continuously monitor sensitive workstations for unauthorized access or suspicious activities. By recording all screen activities, it can help detect potential security breaches in real-time and provide crucial evidence during investigations.

Benefit: Enhances security by allowing continuous, unobtrusive monitoring that can detect and document unauthorized access or other threats, ensuring that all activities are recorded and can be reviewed if needed.

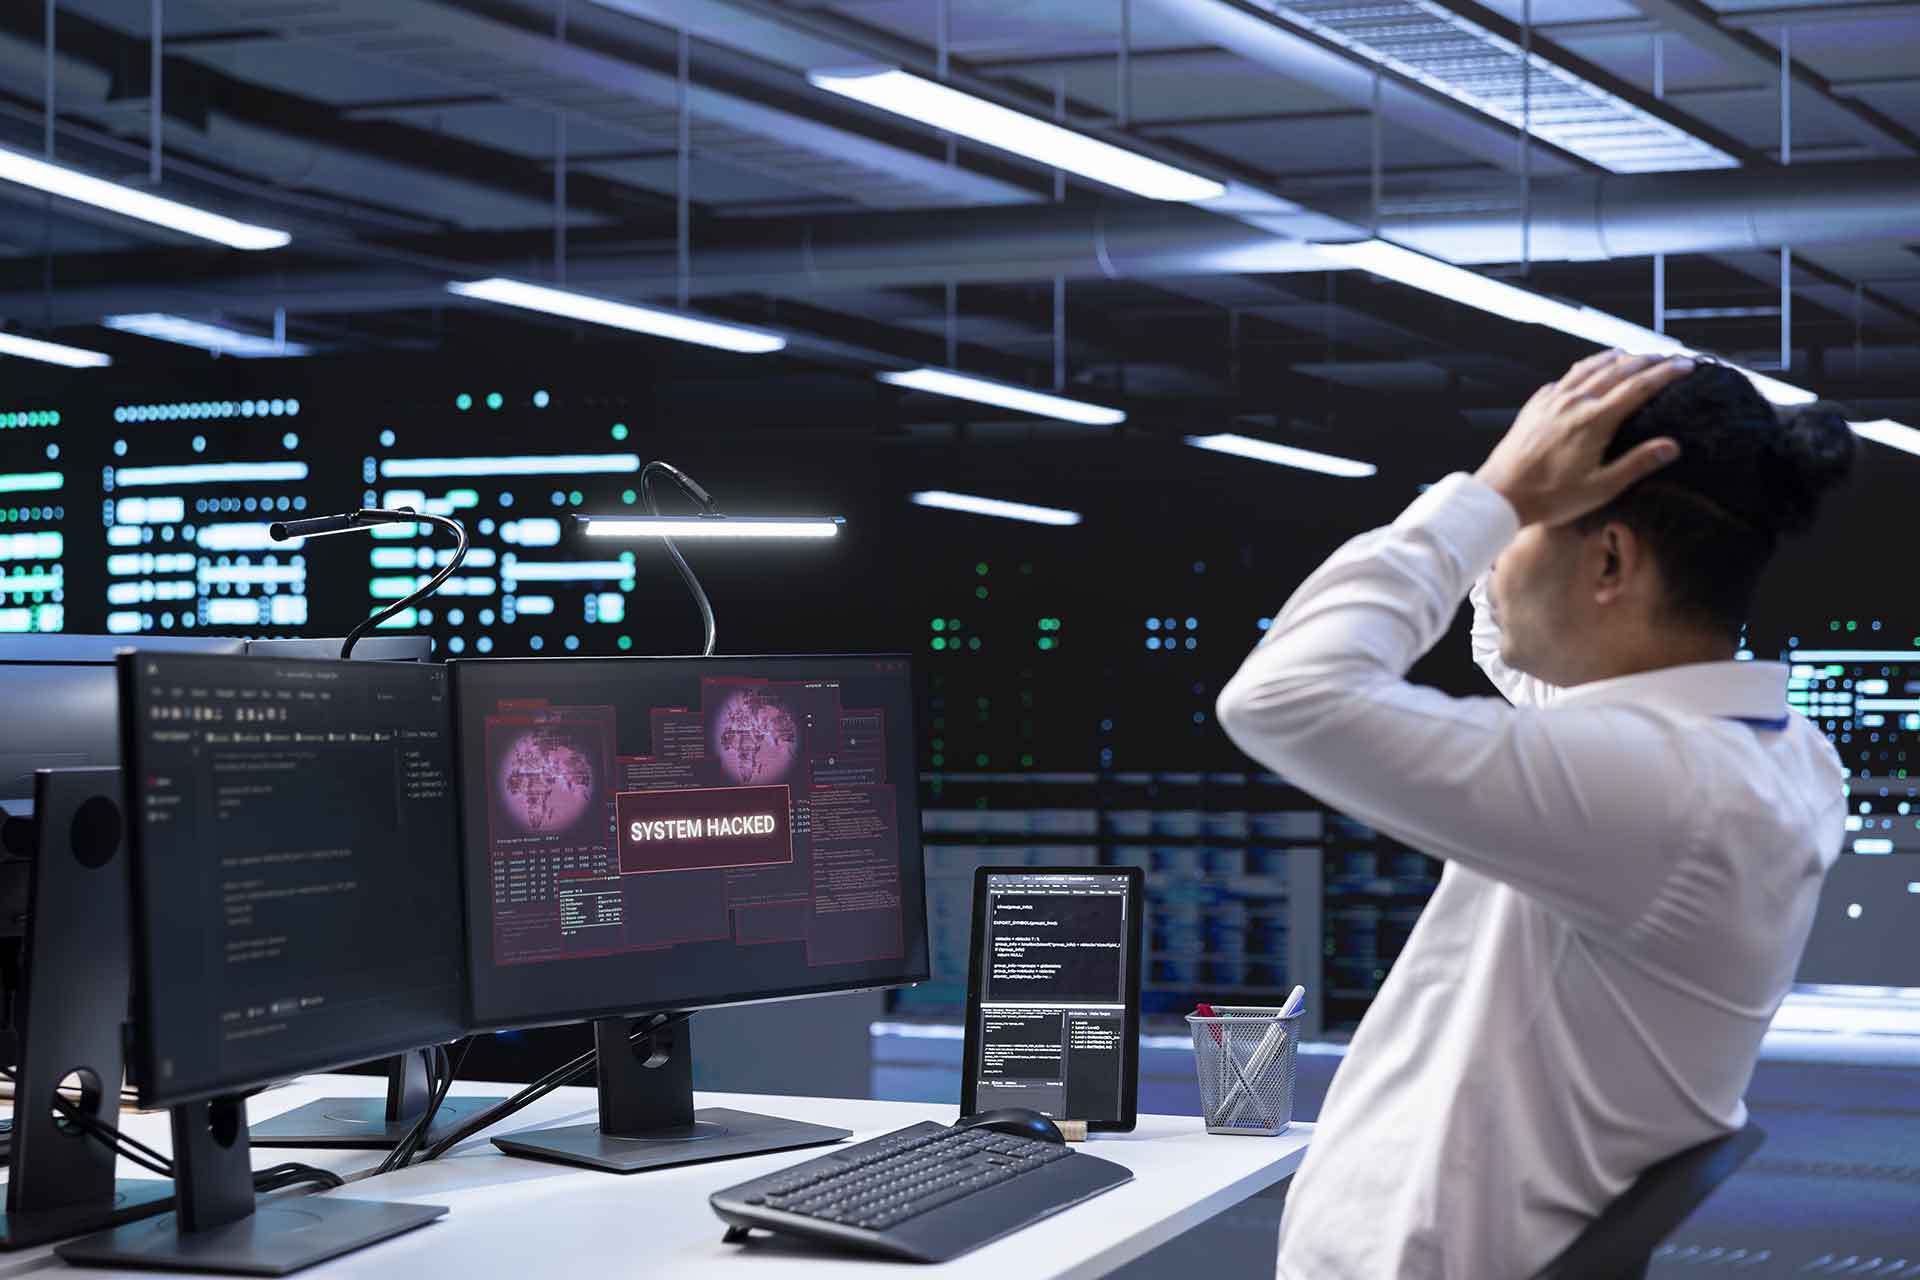
7. Incident Investigation

In the event of a security breach or data leak, Stealth Screen Recorder can be invaluable in investigating what happened. Continuous recording allows investigators to go back and review screen activities to identify the source of the problem, how it occurred, and what data might have been compromised.

Benefit: Assists in quickly identifying the cause of incidents, minimizing potential damage, and preventing future occurrences.

8. Software Usability Testing

During software development, usability testing is crucial. Stealth Screen Recorder can be used to capture how users interact with software during testing sessions. This provides developers with clear, visual feedback on user behavior, allowing them to identify and address usability issues.

Benefit: Improves software usability by providing detailed insights into user interactions and pain points during testing.

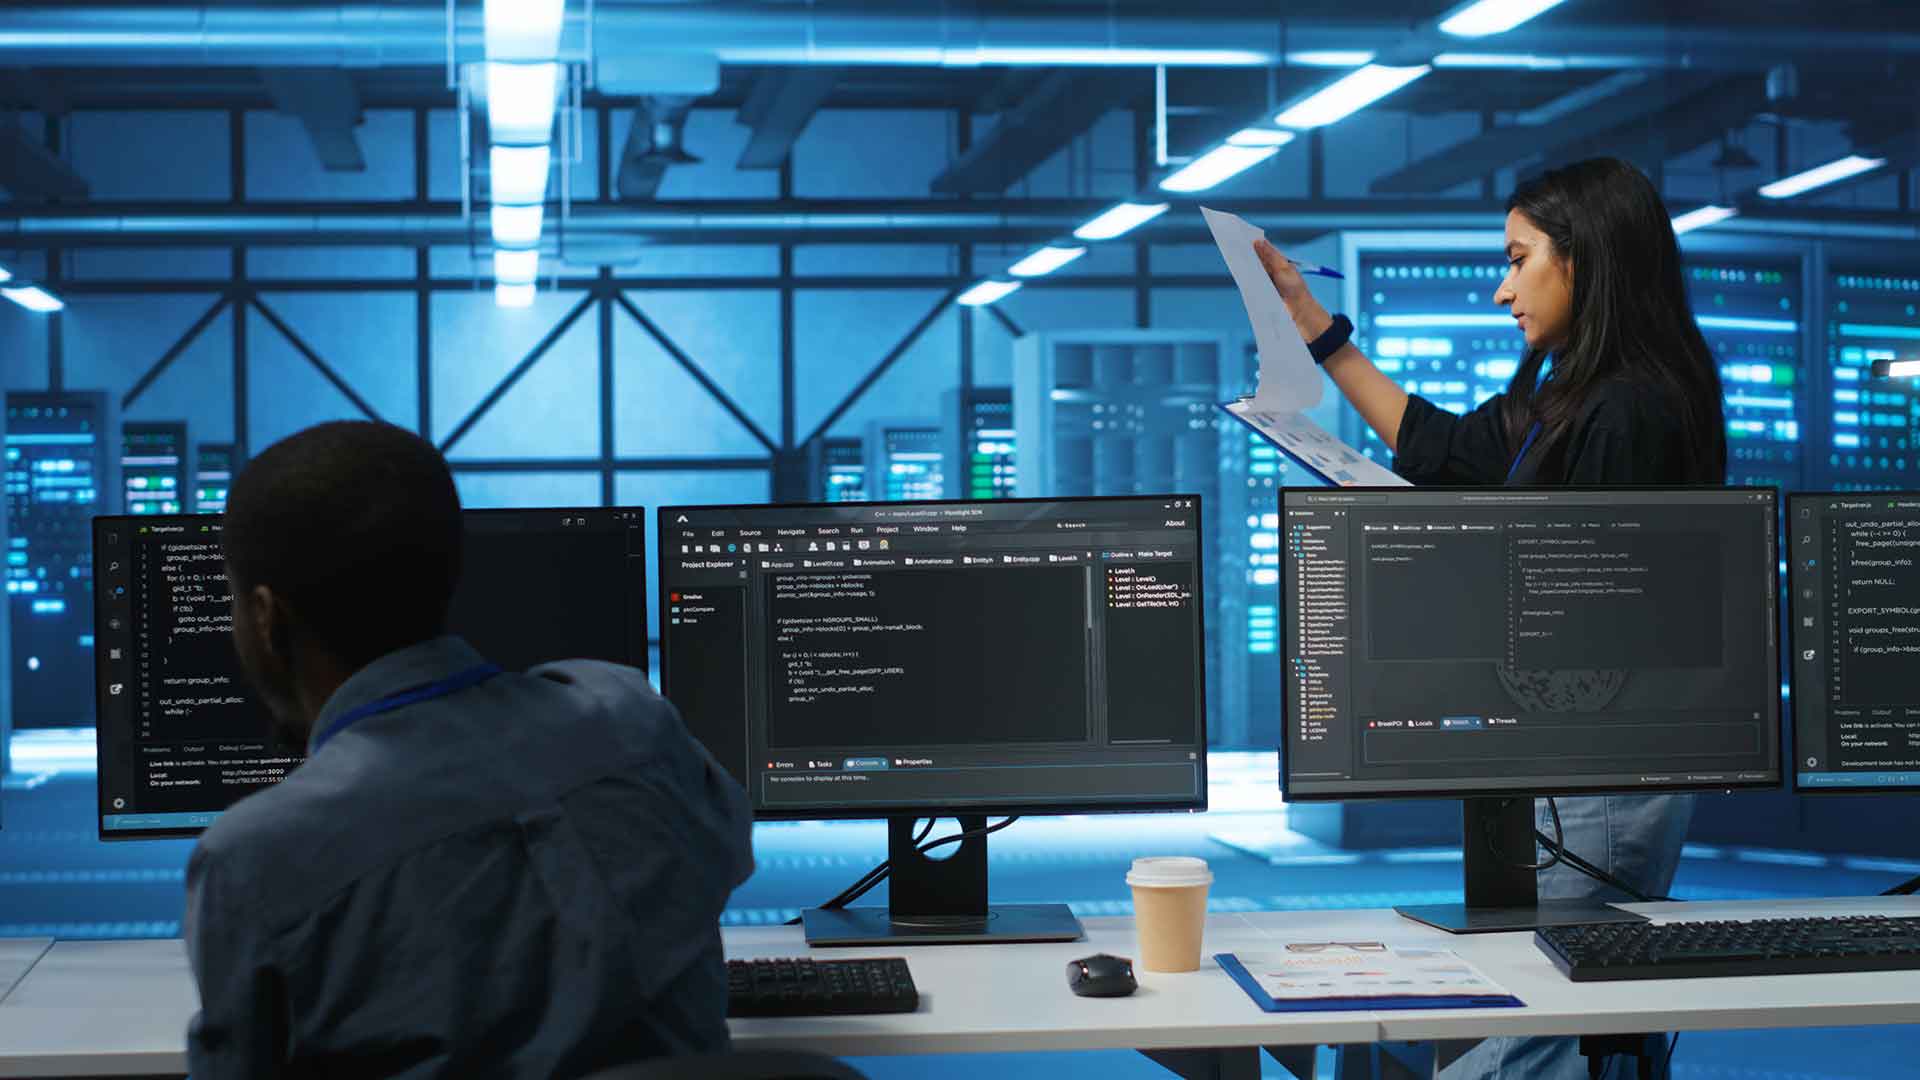
9. Documentation of Software Development Process

Developers working on complex projects can use Stealth Screen Recorder to document the software development process. This can be particularly useful for training new team members, creating tutorials, or for revisiting previous work to understand decisions made during development.

Benefit: Creates a comprehensive archive of the development process, making it easier to onboard new team members or revisit past work.

10. Workflow Optimization

In large organizations, employees often navigate multiple software applications, leading to inefficiencies or bottlenecks in their workflow. Stealth Screen Recorder can monitor and record screen activities to identify areas where time is wasted on non-value-added tasks, such as excessive navigation or frequent application switching.

Benefit: By analyzing these recordings, managers can streamline processes, automate repetitive tasks, and provide targeted training, resulting in increased productivity and a more efficient workflow.

Shopping Cart
  • Your cart is empty.
Scroll to Top